Call/email for the manufacturer's user's manual for the 89218 Fork Reel Attachment.
Our forks listed under the "Forks-Stock" heading are from Vetter Mfg and carry their guarantee. I have never had to resort to a fork warranty, but someone asked.
1.) VETTER warrants that the Products shall be free from defects in material and workmanship for a period of six (6) months from the date of Delivery. VETTER‘s obligations under the aforesaid warranty shall be expressly limited to repairing or replacing, the Products, which if properly used and maintained, prove defective in material or workmanship
Click on link below for pdf on the operating instructions for 88860 Plastic Dump Hoppers

Installation for Pallet Dawg forklift bumpers
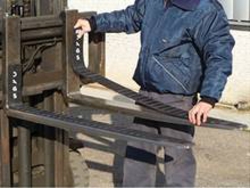
Clean top of carriage bar to ensure good fit
Center unit on carriage
Fit the back piece (Part #2) and plate (Part #3) together. Assemble washers on bolts (Part #4) as shown so lock washer (Part #6) is first followed by flat washer (Part #5).

Align back piece assembly with main body at base. Carefully thread bolt assembly through main body into back piece inserts.
Tighten bolts until firmly seated. Use a torque wrench to 75 foot-pounds.
Check Pallet Dawg is secure and ready for abuse.
According to Wise vinyls seats should be cleaned with 303 Vinyl/Fabric cleaner or dish soap (Dawn or Ivory). They also suggest not using any silicone-based protectants, as they will extract the plasticizer leaving the vinyl hard & brittle.
Below are the installation instructions for Fork Kushions mounting brackets, the polyurethane profiles simply slide into the brackets.
NOTE: To obtain optimum adhesion, the bonding surfaces must be smooth, clean and dry.
Abrade the contact surface using a powered grinder. Remove grinding residue then wipe the entire surface clean with alcohol to eliminate grease or oil contaminants. Apply Primer (provided) following enclosed safety and use instructions. Allow to air dry. (approximately 5 minutes).
Remove tape backing from Fork-Kushion® bracket.
Press Fork-Kushion® bracket against fork upright. Bond strength is dependent upon the amount of adhesive-to-surface contact developed. Firm application pressure develops better adhesive contact and thus improves bond strength.
Additional Notes
The ideal tape application temperature range is from 21°C to 38°C (70°F to 100°F). Initial tape application to surfaces at temperatures below 15°C is not recommended because the adhesive becomes too firm to adhere readily. However, once properly applied low temperature holding is generally satisfactory.
After application, the bond strength will increase as the adhesive flows onto the surface. At room temperature, approximately 50% of the ultimate strength will be achieved after 20 minutes, 90% after 24 hours and 100% after 72 hours.
To establish good surface contact, apply equal pressure to surface of Fork-Kushion® bracket by clamping a rigid surface across the Fork-Kushion® bracket and to the fork upright until the fork truck is returned to service.
Follow this link to the User Manual for Magnetic Fork Covers used to protect product handled directly on the forklift forks and/or improve load handling characteristics.
Click on image below to get a PDF format Owner's Manual for the SweepEx Forklift Broom.

Click on image below for the Owner's Manual of the Fork Mount Trash Can Dumper attachment.
Click on the image below for the installation instructions for the Akro Tilt Forkliftable Tilt Truck.
